Monday, 22 July 2013

Remembering a special friend


Maria was an ex-colleague who had moved to Brittany several years ago. I'd always wanted to go and see the house and garden she was so fond of, but I didn't manage to until after she'd died, last month. So this is a special tribute to her. She was funny, creative, and also had a stubborn streak that I particularly appreciated. Special thanks to Maria's partner Mike who welcomed me in their home.

Here are some photos of Maria and Mike's house and garden. Let's start with the house. It's a beautiful big Breton house on three stories. I could see my friend all over the house, in the decoration and little objects she loved.

The staricase

Beautiful bathroom

The house is full of old French furnishings

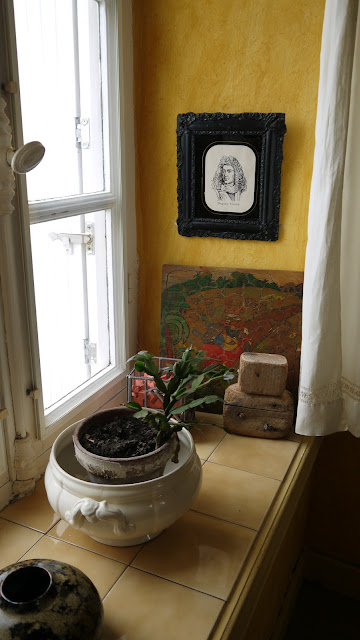
Each windowsill tells a story

One of Maria's many tapestries

Another beautiful tapestry decorates the fireplace

A closer look at the fireplace tapestry.


More art by Maria and her friends in the hall. I love the little stencilled lizards!


More embroidery, and more lizards


Now let's visit the garden... It's a glorious walled garden, beautifully maintained. The day we visited, we were lucky to have sunshine.

The view of the garden from the first floor.
The view from the back door. Did you spot more stencils?

The apple tree

Beautiful yellow roses

The raised beds

Glorious.


The terrace.

And finally, the view of the house from the garden.

Thursday, 20 June 2013

Daisy baby afghan square


Hello there!
I so love making granny squares. I had great fun with those I finished last week for Knit-a-square. I had another delve into my stash, and came across some yarn I bought on a whim once when I was in the UK. It was so cheap, it's acrylic/polyamide (I think) but it still feels soft and cosy. The colours are a bit too pale for knit-a-square so I decided that I'd make a baby blanket either to give away or to sell.
I'd noticed cute daisy squares on some other blogs, and I decided to make my own pattern. After a few attempts I think I got it, so here it is. I've not yet finished the whole blanket, but I thought you might like to join me :-)

You will need:

DK yarn in three colours
4 mm crochet hook
a tapestry needle

It's best to finish off and sew in the ends after finishing each part (as you can see on the photo).

Rnd 1 (yellow). Make a magic circle, 3 ch (counts as first dc) and 11 dc in the magic circle (12 dc). Slst into the 3rd ch of first stitch. Fasten off, weave in ends.

Rnd 2 (white). Puff stitches make up this row. To start, pull a loop of white yarn about 1 cm long through the top of one of the dcs, *yrh and pull another loop (3 loops on hook), repeat from * three more times (9 loops on hook), yrh, pull through all nine loops, yrh, pull through remaining loop. Initial puff stitch finished. Ch 1. For the next and subsequent puff stitches, pull a loop of yarn about 1 cm long through the top of the next dc, yrh, and pull another loop through, repeat three more times, yrh, pull yarn through 8 loops on hook, yrh, pull through remaining loop. Ch 1.
Continue until the end. You should have 12 puff stitches with 1 ch space between each. At the end, make one extra ch and slst to the top of the first stitch. Fasten off and weave in ends.

It may take you a while to get all your puff stitches to the same size. The first ones I made were a bit uneven, but you soon get into the rhythm.

Now the real "granny" part begins. You'll work into the ch spaces between the puff stitches.

Rnd 3 (blue). Attach yarn between two puff stitches, 3ch (counts as first dc), 2 dc in first ch sp, ch 1, 3 dc in next ch sp, ch1, 3 dc in next ch sp, ch 2.
*3 dc followed by ch 1 in each of next 2 ch sps, 3 dc followed by 2 ch in next ch sp.
Repeat from * to end. Slst to top of beginning 3 ch. Turn.

Rnd 4 :  ch 3, in 2ch sp, work 2 dc, 2 ch, 3 dc.  *3 dc in next ch sp, repeat form * twice. Then in corner 2 ch, work 3 dc, 2ch, 3 dc.
Carry on the rnd in the same manner. When you reach the end of the rnd, sl st in top of beginning 3ch. Turn.

Rnd 5:  3 ch, in ch sp work 2 dc, then carry on the round, working 3 dc into each sp, and 3dc, 2ch, 3dc in each corner.  At the end of the rnd, slst into top of beginning 3 ch.  Fasten off and weave in ends.

And there's your daisy baby afghan square. I can't wait to see how yours work out.  I'll be back with a taa daah moment as soon as I've made enough to join them into a blanket. 

Saturday, 15 June 2013

A special day and more charity crochet

Hello there!
Today is a special day in our house. My dear husband of nearly thirty years celebrated his 60th birthday today! We've had a lovely peaceful day and enjoyed the sunshine and a delicious chocolate cake from our favourite French baker's... yum yum :)


And I've made nine more squares for Knit-a-square. Remember the last ones I took with me to South Africa? This time I used the yarn I had left over from my granny ripple blanket, so they all match except for the ninth which I made with lots of little scraps of other leftover yarn.


Are you enjoying the sunshine? Eating cake? Having fun?

Saturday, 8 June 2013

Finger puppets and rattles

Hello there!
Well it's been a long time, again. Almost a month since my last post, naughty me.
The thing is, I've been so very, very busy. I've been busy at home, busy at work, and... busy crocheting!
Would you like to see what I've been making?
Here you are then.


Yes, finger puppets!  They're so much fun to make. Quick and easy :)  I've written up the pattern for the bear, just need to transfer it to the right computer. They're all crocheted with sportsweight yarn and a 3mm hook though you could go down to 2.5 mm. 


I've made another teddy rattle. This one's ecru and navy and has already gone to a new home!


And a ducky rattle! I followed the same pattern as the teddy rattle, adding wings and a beak. 
Here's the pattern for the wings:

Rnd 1: 6sc in a magic circle (see the teddy rattle pattern for details of the magic circle)
Rnd 2: 1 sc in next st, 2 sc in next st, around (9 sc)
Rnd 3: 1 sc in next 2 sts, 2 sc in next st, around (12 sc)
Rnd 4: 1 sc in next 3 sts, 2 sc in next st, around (15 sc)
Rnd 5-6: sc around (15 sc)
Rnd 7: 1 sc in next 3 sts, sc2tog, around (12 sc)
Rnd 8-9: sc around (12 sc)
Rnd 10: 1sc in next st, sc2tog, around (9 sc)
Fasten off.

And the beak:

Rnd 1: 6sc in a magic circle
Rnd 2: *[1sc in next 2 st, 2sc in next st] repeat from * (8 sc)
Rnd 3-4: sc around
You can add a further rnd of you want a longer beak.
Fasten off, leaving a long end for sewing.

I hope you enjoy my patterns. I would love to see your creations, please send me a link or share them on the facebook page

Friday, 10 May 2013

Meandering in May

Hello there!
In May in France we have several national holidays, well at least three. This year, two of them came together on 8th and 9th and I've taken today off too, so that means a very, very long weekend of five days!

We'd planned to do some furniture shopping and assembling. But the car is in bad need of repair and can't be used, so we've had to put the new furniture off for another day. Instead, I've been doing a little bit of crochet, some cooking and tidying up, but the best thing is that the weather has been sunny (at least for part of the time). So we went off for a wander.


I so love to see these bright yellow fields, they look so gorgeous against the blue sky.


A bit further down the path and the view changes. Can you see there's still some snow on the mountains?


I love the contrast of the thick ridged bark and the delicate leaves and dandelions. 


And these new leaves were calling out for me to take their picture. Rebirth. 


I took this one by accident as I was walking along. I like it.


And last of all, the green carpet of leaves and flowers. We had a lovely time. Pity it's raining again today. 


Thursday, 2 May 2013

May Day cushion

Hello everyone!

I hope you had a great Labour Day yesterday. Here in France it is a national holiday so I didn't go to work, but I did finish off some crochet work. And here's the result, my May Day cushion! (scroll down for the pattern).


Isn't it just lovely? It was one of those things - I bought the yarn in a sale, then saw a similar cushion on one of the blogs I read, and realised I just HAD to make a cushion with that yarn!

I didn't follow exactly the same pattern as Heather on Pink Milk, who joined her rounds with a slipstitch. I just made two simple hdc circles and crocheted them together with a shell border. Like Heather, I did use the lovely May rose from Attic24 to decorate my cushion.  My cushion is also quite big, so the central rose does look a bit small. But I love it anyway. We needed  new cushion and I think it looks particularly nice on my armchair.


Here's how I made it:

1. Start with a magic circle and 6 sc.
2. 2 hdc in each stitch.
3. *1 hdc in next st, 2 hdc in next st, rep from * to end. (it's a good idea to use a stitch marker on the first stitch throughout)
4. * 1 hdc in next 2 sts, 2 hdc in next st, rep from * to end.
5. * 1 hdc in next 3 sts, 2 hdc in next st, rep from * to end.
6. * 1 hdc in next 4 sts, 2 hdc in next st, rep from * to end.

Continue the pattern, increasing the number of single hdc in between each set of 2 hdc until you reach the required diameter for your cushion.

Then make a May rose from the cute and easy pattern by Lucy at Attic24, and sew it to the centre of one of the circles.

You can use a cushion pad you have bought or upcycled, or you could make your own. I made mine from an old sheet and filled it with polyfil. It's 40 cm across and the final row of my crochet circle has 20 hdc in between each 2 hdc. Make sure your cushion pad is washable, as the cover isn't removeable.

For the border, I did the following:

* slip stitch in first st, 5 dc in next st, slip stitch in next stitch, repeat from * to end.

Remember to put your cushion pad in place while you still have room for it! If you have a very fat cushion pad as I did, you'll have to do quite an amount of the border with the pad in situ.

To finish, sew in the ends and you're done!

Tuesday, 23 April 2013

Granny ripple Ta daaah!


Some early followers of my blog, and I mean REALLY early followers, may remember me talking about  starting this blanket ages and ages and ages ago. It's so long ago that I cannot find the original post. I've been making it on and off for well over a year. And the good news is: It's done! Finished! 
This is a really easy pattern and goes very quickly (believe it or not). The reason I took so long was that I've been sidetracked by lots of other little projects, but if I'd worked solely on the blanket it would have probably taken me three months at most. Anyway, it's now finished and has gone to its new owner. I made it with Schachenmayr nomotta Bravo yarn, it's 100% acrylic but very soft and not at all scratchy. 
I took the photo on the stairs because it was the easiest way to see the whole blanket but the blanket is single bed size. And please ignore that loose thread. I did weave it shortly after taking the pic.